A recurring question we get from our customers is “how do I remove the hard disk or SSD from my computer (or laptop)?”, which is why we decided to write an explanatory and detailed article so you don’t get it wrong.
There are times when storage devices need to be removed, whether for replacement, maintenance or to be sent to data recovery companies. It is therefore important to know how to remove them properly to avoid damage.
Many people may think it’s a difficult task, but it’s simpler than it sounds. However, if you don’t feel confident enough to do the step by step, we recommend that you get a qualified professional to do it for you.
But first, check out all about how to remove a hard disk or SSD correctly!
What is a hard disk?
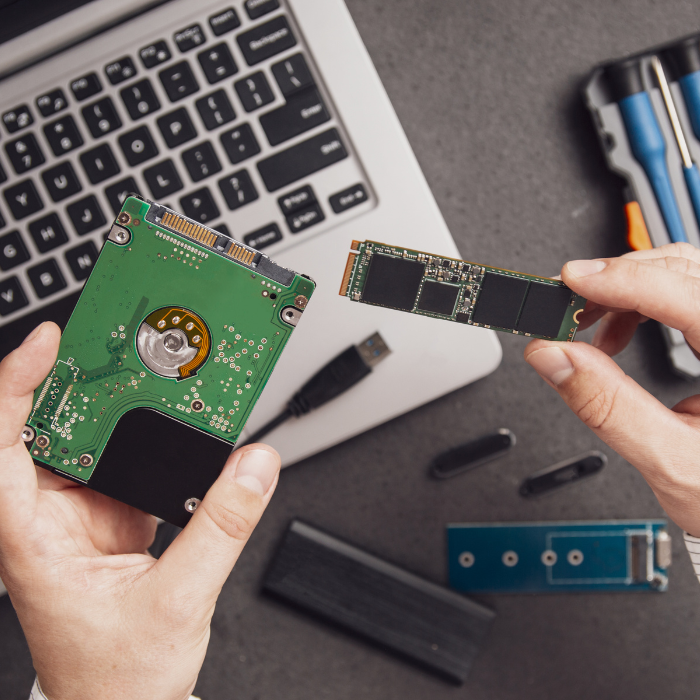
A HARD DISK is a data storage device that has been used in computers and laptops for a long time, but has evolved over the years.
It’s worth noting that all the information it contains remains there even when the machine is switched off. That’s why it’s often used to store photos, videos, files, programs, etc.
There is also an external version that performs the same function. However, the external disk is only connected to the machine to transfer or receive information. In other words: it doesn’t stay connected, like the traditional one.
What is SSD?
SSD, or Solid State Drives, are considered the “replacement” or “evolution” of traditional hard disks, as they have superior performance.
Its main function is also storage. However, because it uses flash memory, some characteristics stand out: it has faster read and write speeds, uses less energy, is more resistant and makes less noise.
There is also an external version, but it is not as popular as hard disks.
How do I remove the hard disk or SSD from a desktop PC?
To prove that removing a hard disk or SSD from a computer is simple, we’ve put together a quick step-by-step guide that can be done by anyone.
But remember: this is a general tutorial and may not be suitable for your machine. Therefore, if necessary, ask for professional help.
Check out the step-by-step below!
Step 1: Unplug your computer
It may seem obvious, but it’s an important step if you don’t want to hurt or damage your machine or hardware.
Step 2: Open the computer lid
It’s not difficult to remove the lid from your PC’s case, but you will need a Phillips screwdriver (or screwdriver) to remove the screws that are holding it on. Don’t forget to reserve them properly so you don’t lose them, as they will be used again to attach the lid.
Step 3: Find the hard disk or SSD
If you have ever seen a hard disk or SSD in your life, it won’t be difficult to find them inside the case, but if you have to, look up the images on the internet so you don’t misplace the device.
Step 4: Remove the hard disk or SSD
Remove with caution so as not to damage your SSD.
Step 5: Disconnect the cables
In order to work, the SSD or hard disk must be connected to certain cables. So identify them all and disconnect them carefully.
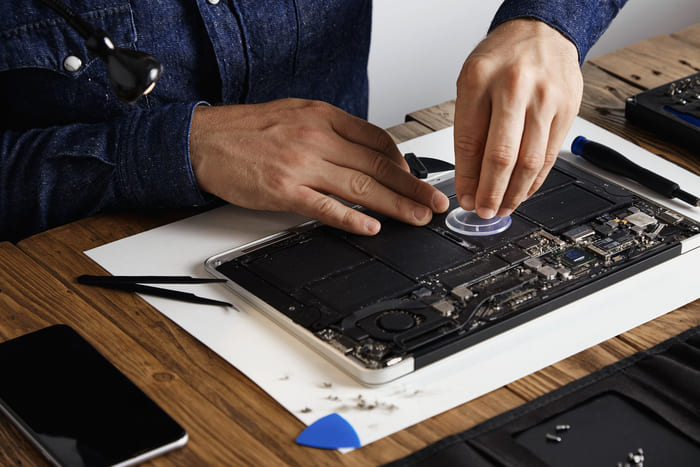
How do I remove the hard disk or SSD from a laptop?
On a laptop, the process is a little different, due to the model of the device. So take a look at the steps below.
And the point is the same: if you feel the need, ask for professional help to remove your hard disk or SSD.
Step 1: Turn off your laptop
It must be completely switched off and unplugged to avoid accidents to the user or damage to the device.
Step 2: Remove the laptop’s back cover
To do this, turn the device over on the table, take a Phillips screwdriver and remove all the screws on the back.
Step 3: Find the hard disk or SSD
It probably won’t be difficult to find them inside the laptop, but if you have trouble, look for images of SSD hard disks on the internet so you don’t misplace the device.
Step 4: Remove the hard disk or SSD
Remove with caution so as not to damage the parts, disconnecting the cables carefully, and replace the back cover of the laptop so as not to lose the screws and leave all the other hardware preserved.
Step by step for physically changing hard disks
- Remove the laptop’s bottom cover;
- Locate the hard disk and unplug the power and data connectors;
- Remove the screws securing the hard disk frame and the screws securing the hard disk to the bracket;
- Attach the frame with the new SSD to the place reserved for the hard disk and connect the power and data cables;
- Check that everything fits properly.
Step by step to install the operating system
This part is only necessary if your operating system is installed on the hard disk or SSD removed from the machine:
- Plug the USB stick into the laptop, turn on the computer, and install the operating system;
- Turn off the computer, turn it back on and press the BIOS access key;
- Change the order of the devices, making the USB stick the first boot option;
- Save the BIOS settings and exit.
Conclusion
See how difficult the procedure is? If your question was how to remove the hard disk or SSD, now you know how.
Now, if your next intention is to recover the data that is on one of these devices, we can also help. Bot Recuperação de Dados has been in the professional data recovery market for over a decade and has everything you need to get your information back: speed, security and efficiency.
Do you have any questions? Contact us and find out how to send your hard disk or SSD for recovery!