


Removable drives are very handy for storing large files without filling up your computer. Flash drives, external hard drives, SD cards and DVDs are some of the main examples. Your computer detects them automatically, but some problems can make them unreadable or impossible to write to. If your drive has become write-protected, this article explains what the problem is, what to do and several ways to fix it.
Errors like this can have a logical or a physical cause, and repeated repair attempts can make things worse. If the files matter, see how USB flash drive recovery works, starting with a free diagnosis.
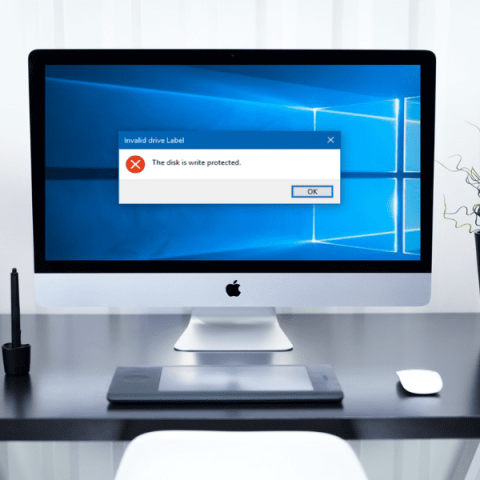
What is write protection?
If you get an error message such as “The disk is write-protected” when you connect a storage device, it means you can’t write to it or format it until the problem is solved. It happens in Windows 7, 8, 8.1, 10 and 11. A common cause that people often overlook is a lock switch on the device that turns write protection on. A full device can also stop you saving files, with a similar-looking error. These problems are easy to solve, but some cases are more complicated: the error may be caused by a faulty partition, a malware attack or a hardware fault in the device itself. In any case, the write protection has to be removed before you can use the drive normally again.
What to do when a disk is write-protected
When Windows detects that an external storage device is write-protected, it blocks any operation that would change it, from saving files to formatting. The drive becomes read-only: you can view the files, but you can’t edit them. If that’s the case, copy any important files to another drive straight away, while they can still be read. Depending on the cause, the problem may be solved with the following methods:
1. Check for a lock switch
Sometimes all it takes is flicking a small switch. Check your device carefully for a lock switch, usually found on the side of SD cards and on some USB flash drives. You can also check the user manual.
2. Disable write protection in the Registry
To use this method, follow these steps (editing the Registry incorrectly can cause problems in Windows, so follow them carefully):
- Type “regedit” in the search bar and click the top result;
- In Registry Editor, use the tree on the left-hand side to go to
HKEY_LOCAL_MACHINE\SYSTEM\CurrentControlSet\Control; - Look for the “StorageDevicePolicies” key and select it. If it doesn’t exist, right-click “Control”, choose New > Key and name it “StorageDevicePolicies”;
- If there’s no “WriteProtect” value on the right, right-click an empty area on the right-hand side of the window, select New > DWORD (32-bit) Value and name it “WriteProtect”;
- Double-click “WriteProtect”, set its value data to “0” and click “OK”;
- Finally, unplug the external drive and plug it back in.
3. Remove write protection with the Command Prompt
For this method, follow these steps:
- Open the Command Prompt as administrator;
- Type “diskpart” and press Enter;
- Type the commands below one at a time, pressing Enter after each one (replace N with the number of your removable drive, which you can identify by its size in the list — selecting the wrong disk can affect another drive):
list diskselect disk Nattributes disk clear readonly
- When you see the message “Disk attributes cleared successfully”, type
exitand close the Command Prompt window; - Now reconnect your device.
4. Check the account permissions
To check the account permissions and remove the write protection, do the following:
- Open File Explorer and go to “This PC”;
- Right-click the removable drive and select “Properties”;
- In the window that opens, go to the “Security” tab (available on NTFS drives), select “Everyone” in the list of groups and users and tick “Allow” next to “Write”.
Remember that you may need to click “Edit” before you can tick or untick the options.
5. Check the free space on the device
If your external storage device is full, you won’t be able to save anything to it, which can look like write protection. To fix this, you may need to delete unnecessary files to free up space. To check:
- Open File Explorer;
- In the left-hand pane, select “This PC”;
- Find the storage device by its name or type. The storage details are shown below the name. A red bar means the drive is almost or completely full.
6. Check for viruses
If malware has infected your system, it may have spread to the external storage device as soon as you plugged it in. Before using these devices, run a scan with an antivirus program or Windows Security. Viruses can delete, modify and corrupt important files. To prevent this, install a good antivirus program, which will detect these threats automatically.
7. Format the drive (this erases all data)
Formatting the drive can also solve the write-protection problem — but only if you no longer need the data or have already copied it elsewhere. If the protection is caused by a hardware fault, formatting will fail anyway. To format:
- Restart your PC in Safe Mode: in Windows 7, press F8 during startup and choose “Safe Mode with Command Prompt”; in Windows 10 and 11, hold Shift while clicking Restart and go to Troubleshoot > Advanced options > Startup Settings;
- Open the Command Prompt as administrator;
- Type
format X: /fs:exFAT, replacing X with the drive’s letter (use NTFS or FAT32 if you prefer), and press Enter.
Remember that formatting the device erases all the data on it.
8. Check for bad sectors
Your drive may have become write-protected because of bad blocks. To check whether this is the case (the scan can repair errors, so copy your important files first):
- Open File Explorer and go to “This PC”;
- Find the external device, right-click it and choose “Properties”;
- In the new window, go to the “Tools” tab and, under “Error checking”, click “Check” (in Windows 7, tick “Scan for and attempt recovery of bad sectors”).
How to fix a write-protected drive in Windows 11/10/8/7
When your flash drive, SD card or hard drive (internal or external) is write-protected, you can’t make changes to it or to the data stored on it. So how do you remove write protection? On USB flash drives and SD cards that suddenly become write-protected, the cause is often a hardware fault: when the flash memory wears out or fails, the controller locks it in read-only mode to protect the data. In that case, copy your files immediately, while they can still be read. You can still try the following:
Flip the lock switch
Removable storage devices are widely used to store data and can suffer from various faults, especially the “disk is write-protected” error. When Windows write-protects your drive — a USB flash drive, for example — you can’t use it normally until the protection is removed. If the device has a physical lock switch, the solution is easy.
Some USB flash drives and SD cards have a physical switch on the side to protect the data.
If it’s on, the device is write-protected on every PC or device you plug it into. You can fix this by flipping the switch. To do this:
- Find the physical switch on your USB flash drive or SD card;
- Slide the switch to the unlocked position.
Scan for and remove viruses
When you connect a storage device to a computer, it can easily become infected with viruses. USB sticks and SD cards can also be blocked or attacked after downloading files from untrustworthy websites. The data can then be locked or inaccessible, which can lead to the “disk is write-protected” error. In this case, use reliable antivirus software to scan the drive and remove the viruses.
Clear the read-only attribute
Sometimes the problem lies with a single file.
If you want to change a single file but can’t, the file itself may be write-protected. If so, check whether its “Read-only” attribute is turned on. To do this:
- Right-click the write-protected file and select “Properties”;
- Look at the attributes at the bottom and make sure “Read-only” is unticked. Then click “Apply” for the change to take effect.
Use the Command Prompt
Another effective way to remove write protection and fix the “disk is write-protected” error is the Command Prompt. If you’re comfortable with CMD, follow these steps:
- Press Windows + R, type “cmd” and run the Command Prompt as administrator (or search for Command Prompt and choose “Run as administrator”);
- Type the commands below one at a time, pressing Enter after each one (replace N with the number of your removable drive, which you can identify by its size in the list — selecting the wrong disk can affect another drive):
diskpartlist diskselect disk #attributes disk clear readonly
(where # is the number of the connected drive that shows the write-protection error; check it carefully by its size before selecting it)
- Finally, type
exitand close the Command Prompt.
Edit the Registry
There are several ways to remove write protection in Windows, and editing the Registry is a popular one. Before you start, connect the write-protected flash drive to the computer.
- Press Windows + R, type “regedit” in the Run dialog box and press Enter to open Registry Editor;
- Go to the following location and look for a value called WriteProtect:
HKEY_LOCAL_MACHINE\SYSTEM\CurrentControlSet\Control\StorageDevicePolicies
- If it exists, right-click it, select “Modify” and change the value from 1 to 0.
Read next
Conclusion
A drive can become write-protected because of a lock switch, a full drive, a faulty partition, a malware attack or a hardware fault. To find out which, check the device’s lock switch, disable write protection in the Registry or remove it with the Command Prompt. You can also check the account permissions, check the free space on the device and scan for viruses. Once you know what caused the write protection, you can fix it by flipping the lock switch or finding and removing the virus. You can also clear the read-only attribute, use the Command Prompt or edit the Registry. Other options are checking for bad sectors or formatting the drive. Remember that formatting erases all the files stored on the drive — and if you need them back, your best option is a professional data recovery service, like the one we offer at Bot, with more than two decades of experience and more than 200,000 cases. Our experts work to recover your data using proven techniques, in a Class 100 (ISO 5) cleanroom when the case requires it, without putting your device at further risk. And you don’t need to worry about getting your device to us: we collect it free of charge (islands not included), or you can drop it off at one of our reception points. If you have any questions, you can also contact us on social media, with 24/7 support. Start your recovery with us now!


