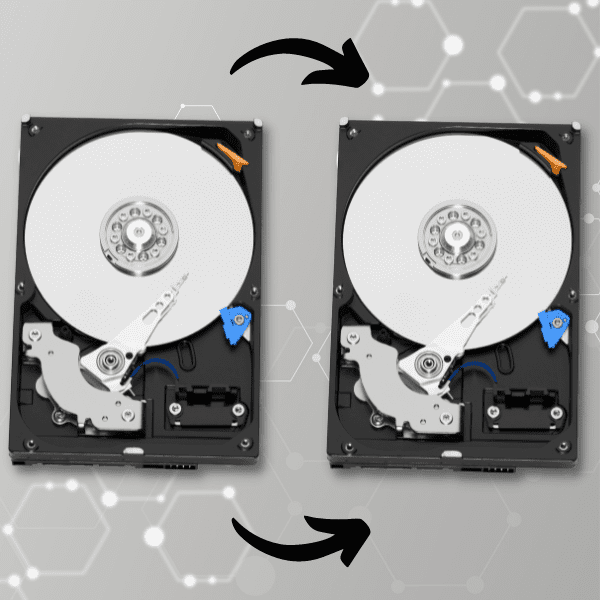
Cloning a disk has many benefits and is also an easy way to manage your storage solutions.
Cloning allows you to create a 100% faithful copy of your entire disk, useful when you need to make a backup or transfer data.
Even better, this process also allows you to copy your operating system installation with its preferences, programs and settings completely intact.
However, before you clone your disk, it is important to familiarize yourself with the process.
That’s why, in this article, we will help you understand how cloning works and when it’s necessary, as well as explaining how to carry out the process correctly on your Windows or Mac.
What is drive cloning?
To clone a disk is to make an identical copy of the original drive, including its operating system (as well as all the files needed to start up and run the computer correctly).
However, many people confuse disk cloning with backup – processes that differ in two ways:
- Backups only copy files: a backup – whether in the cloud or on an external disk – only creates copies of your files, it doesn’t work as an independent drive
- Cloning copies absolutely everything: a cloned disk is identical to the original and can be started and operated normally.
When is disk cloning necessary?
You can clone your disk to create a complete backup, to migrate to a new drive and even to facilitate the drive upgrade process, as we will see below:
Create a full backup
It is ideal for ensuring that your data is accessible even after a malware attack (which damages files, data or even the entire operating system).
For example, if your PC is attacked by ransomware, your files are encrypted and rendered unusable, while the attacker demands a ransom to decrypt them.
If you have a cloned disk, simply swap the infected disk for the cloned disk and you will have the system, programs and files that existed at the time you made the clone and you won’t need to pay the ransom.
Migration to a new hard disk
If you have bought a new computer, you don’t need to reinstall everything on the new machine. Simply remove your original disk, clone it to the new computer’s disk and you can even use the old disk in an external case and keep it as a backup drive
Drivep update
Finally, when you decide to replace your disk with an SSD, cloning is useful for moving all your data to the new SSD.
How does disk cloning work?
Cloning the disk involves some basic steps to ensure that the process is successful. Check out each one below:
Get a second drive
Obviously, you need a place to host the cloned version of your current drive – this could be an integrated secondary drive or an external drive.
It is not enough to simply buy a new disk. You should also check if there is a way to connect the two hard drives.
Generally, this can be done using a USB to IDE/SATA adapter.
Check the drive capacity
Make sure that the destination disk (the one you are cloning data to) is bigger than or equal to the source drive (the current one).
Download a cloning utility
For Windows, the most popular free option is Macrium Reflect Free and on macOS, the SuperDuper! is an alternative.
There are also paid alternatives with more features, such as Paragon Drive Copy e EaseUS Disk Copy Professional. Among the advanced features of these tools are incremental cloning, scheduling, elaborate file backups and encryption.
But for simple use, the free tools should work fine.
Make sure the new disk is formatted or free of important data.
The data on the destination disk will be permanently destroyed and replaced by the data on the source drive. Formatting a hard disk can take a long time. So take this step before you start cloning.
Clean your original disk
Get rid of programs you don’t need and remove temporary files and duplicate data. After all, why clone gigabytes you don’t need?
How to clone a disk in Windows
Now that you have everything ready to start the process, just follow the steps below to clone your disk in Windows:
1. Download and install a reliable disk cloning tool
Windows comes with a built-in tool called System Image to help you transfer your hard disk.
System Image only works if you’re cloning your hard disk to a larger hard disk, so you can’t use it to clone hard disk partitions.
You can also make a disk image, which differs from hard disk cloning in that it creates a single file containing all the data on the disk instead of making a disk-to-disk copy.
2. Select the drive to be cloned
Select the disk you want to copy (making sure to check the leftmost box if the disk has several partitions) and click on “Clone this disk” or “Image this disk”.
3. Specify the destination of the clone
In the next window, choose your destination disk – the one that will house your newly copied data.
Remember that this will erase all the data on the destination disk, so be careful which one you choose.
If there is any old data on it, you can select it and click the “Delete existing partitions” button until the drive is empty.
If you’re cloning to a larger drive, click the “Properties of the cloned partition” button at the bottom of this window and extend your main partition to fill the entire disk space.
4. Start cloning
The next page will ask if you want to schedule this clone, which is useful if you want to regularly create images of your drive for backup purposes.
On the next page, you can also save the backup and its schedule as an XML file – for security.
5. Enter UEFI/BIOS to make sure the cloning was successful
Finally, to make sure everything is working properly, you can start your computer using the cloned disk.
To do this, enter the BIOS (Basic Input/Output System) or UEFI (Unified Extensible Firmware Interface) and configure the computer to boot with the cloned disk instead of the original.
Remember that the BIOS is located in your PC’s firmware settings – on newer PCs it has been replaced by an interface called UEFI.
To access the BIOS on older PCs, you need to press a key (or combination of keys) while booting up.
This is usually F12, F2, Esc or Delete – you can confirm this on-screen during the boot stages.
Once in the BIOS, select the “Boot Order” option or just “Boot” and indicate that your PC should use the cloned disk when booting.
To access the UEFI, you need to open the Windows menu (in the bottom left-hand corner of the taskbar).
Then click on “Power On/Off”, hold down the “Shift” key and then click on “Reset”.
After a reset, your PC will display various advanced configuration options. Follow the path: “Troubleshoot > Advanced options > UEFI Firmware Settings” and then “Restart”.
Once inside the UEFI, simply tell the computer to use the cloned disk to boot.
Disk cloning on Mac
To clone the disk on a Mac operating system, follow the steps below:
1. Open Disk Utility
To do this, follow the path “Applications > Disk Utilities”. Another way is to open Spotlight by holding down the “Command + Space” keys and searching for Disk Utility.
2. Select the destination disk and press Restore
In the top bar of Disk Utility, select “View > Show all devices”.
Then look for the drive you want to use as a clone in the left-hand sidebar.
Don’t forget that at this point you are selecting the destination drive – not the original one that will be cloned.
Finally, select “Restore”.
3. Choose the original disk from the drop-down menu
In the “Restore from” pop-up, select the original drive. You will be warned by the utility that this process will erase all the data on the disk.
There is usually only one drive on your Mac – which you should select from the drop-down menu before clicking “Restore”.
4. Wait for the cloning to complete before clicking “Done” in the dialog box
The application will show a progress bar that fills up as the cloning progresses.
Only when it is completely full, click on “Done” to finish the process.
5. Start the new drive to check that the clone is working.
Finally, boot your Mac from the cloned disk to test your drive.
How long does it take to clone a disk?
It depends on two main factors: data volume (capacity of the disk to be cloned) and the speed of the computer controller on which the work is being done.
At a speed of 100 Mb/s, for example, it takes (on average) 90 minutes to clone a disk with 500GB of data.
But cloning the same amount of data at half the transfer speed can take up to twice as long, up to 3 hours!
In addition, you have to consider that faster cloning makes the process faster, but high volumes of data make the process take longer.
However, if the original disk and the destination disk are on the same PC, the direct connection to the motherboard makes cloning faster than with an external drive.
It is also important to note that many drives transfer data at much lower speeds than the maximum advertised – after all, these figures do not cover the type of activity sustained for the cloning process.
What to do when cloning is stuck or takes too long?
Cloning can present problems when your old disk has bad sectors. In this case, the process may have long pauses, get stuck at a certain point or be interrupted.
To resolve the issue, you’ll need to turn to a professional data recovery service. Only companies like Bot have professional equipment that can clone disks with damaged sectors, bad blocks or other problems.
It’s important to note that if you’re having trouble cloning your disk, don’t make any more attempts, as you could be destroying the disk with each attempt. Recovery needs to be done by professionals so that the disk (and the data) is not permanently destroyed.
Conclusion
Cloning the disk creates a perfect copy, fully bootable and exactly the same as the original.
This is useful for making a complete backup of valuable data, migrating to a new computer or when you want to upgrade your disk to a solid state drive (SSD).
To be able to clone your disk, you need to download and install a cloning tool, select the drive to be cloned, specify the destination of the clone and – after finishing the process – enter UEFI/BIOS to make sure it was successful.
On both Mac and Windows, cloning can take a long time. Everything will depend on the transmission speed and the volume of data to be cloned.
Finally, it us worth noting that cloning can cause data loss – if you don’t have a backup of your files.
In this case, to recover your data, you’d rather use a specialized professional service – to ensure that your disk isn’t further damaged.
We at Bot can recover your disk data easily and safely. We work with the Clean Room: a particle-controlled environment where your disk will have its integrity protected.
In addition, we have successfully resolved more than 100,000 cases over more than a decade of operation.


