External disk drives – including USB flash drives and SD cards – should be easy to use on your computer.
But in some cases, you may connect your external drive and find that it doesn’t appear in the disk manager.
This problem has several possible causes: partition problems on the external drive, incorrect use of the file system, inactive USB ports or driver problems. In the worst case, the drive itself may be damaged.
In this article, we’ll take a look at what to do when your external drive doesn’t appear in Disk Management.
What to do when the external drive is not recognized?
When your disk doesn’t appear in Disk Manager, some options to fix the problem are:
- Check the disk manager;
- Test another port;
- Check for problems via Device Manager;
- Try formatting or creating a new partition;
- Wipe the drive and format it via Diskpart.
Let’s see how to proceed with each of these alternatives:
1. Check the disk manager
If your external disk doesn’t appear in Disk Manager, it’s time to do some research.
Open the “Start” menu, type “Disk Manager” and press “Enter” when the “Create and Format Hard Disk Partitions” option appears.
Once Disk Manager loads, scroll down to see if your disk appears in the list.
If it does, make sure it’s online and formatted. If it’s offline, right-click on the disk name (e.g. “Disk 2”) and select “Online”.
If the external disk has not been formatted, “Unallocated” will appear under a black bar.
In this case, right-click and choose “New Simple Volume”. This also solves the problem if the drive is formatted for another operating system.
Remember that formatting will erase all the data on the drive. So only continue if you’re sure you don’t need anything from it.
Finally, if your external disk is online and formatted, but doesn’t show a drive letter next to its name, right-click on the disk and select “Change drive letter and paths” to add a drive letter.
Remember to choose a letter that is not being used by another disk.
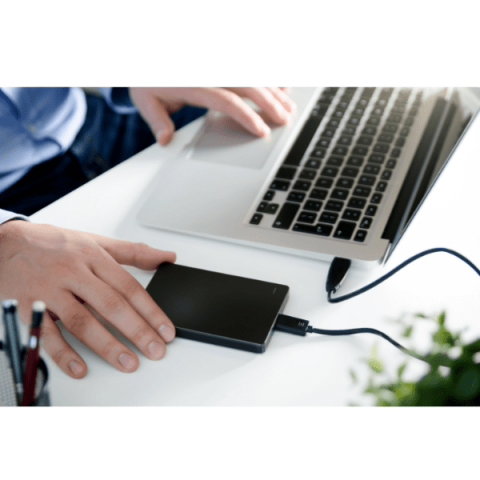
2. Test another USB port or computer
Another possible way to access your external disk when it doesn’t appear in the disk manager is to change the USB port or try connecting it to another computer.
It’s possible that the port you connected it to is failing or that the cable is just not in good contact.
If it’s connected to a USB 3.0 port, try a USB 2.0 port; if it’s connected to a USB hub, try connecting it directly to the PC (some USB hubs don’t provide enough power for the external disk to work).
You could also try another computer. If you can, try connecting your external disk to a computer running another operating system.
For example, if you can’t get the drive to show up on a Windows PC, try connecting it to a Mac.
It’s possible that the external disk isn’t formatted for the computer you’re trying to use.
In this case, you will need to copy this data to a drive formatted for that OS and thus have compatibility.
3. Check for problems via Device Manager
If your external disk appears on other computers, this means that the system may have a driver problem with your device.
You can check this using the Device Manager.
To open it, press Win + X (or right-click on the “Start” icon) to open the “Advanced User” menu and select “Device Manager” from the list.
You can also enter devmgmt.msc in the Run dialog box to open it.
In Device Manager, expand the “Disk drives” category and check for devices with a yellow exclamation mark next to them.
Also check the “Universal Serial Bus” driver session.
If you see the error symbol for any entry, it could be your external disk that doesn’t appear in the disk manager.
To try to solve the problem, right-click on the device, select “Properties” and check the error message under “Device status”.
You can also go to “Settings” > “Update and security” > “Windows Update” to check for new updates, which is always a good idea when you’re having problems with Windows.
Running this update check also identifies driver updates. These may appear under “View optional updates” > “Driver updates”, so it’s worth checking there too.
To update a specific driver that doesn’t appear, right-click on “Device Manager” and choose “Update driver” > “Search for drivers automatically”.
With this, the system will check if there is a newer driver on your computer.
If this doesn’t work, search for the name of your device online to see if a newer driver is available from the manufacturer.
4. Try formatting or creating a new partition
If your external disk has appeared in Disk Manager but has an “Unallocated” status, you can try formatting it and creating a new volume.
To do this, follow the step-by-step instructions below:
- Go to the “Start” menu and select “Create and format hard disk partitions”
- Click on the “Unallocated” space on your external disk and select “New Simple Volume”.
- The New Simple Partition Wizard will open. Go to the size selection screen, enter the size of your partition in megabytes and click “Next”;
- Now assign a drive letter, choosing one that is not already being used by another disk/partition;
- Next, select a file system (preferably NTFS) and a name for the label. Click “Next” and finish on the next screen.
5. Clean the drive and format via Diskpart
In some more specific cases, the external disk even appears in Disk Manager, but formatting the drive simply doesn’t work.
In this case, to recover the external disk’s full capacity, you’ll need to run the “wipe” command in Windows Diskpart, which will return the drive to a completely unformatted state.
Remember that this will delete any files on your external disk. So only proceed if you have no other options – and make sure you wipe the correct disk, or you could lose a lot of data.
To wipe the drive and format it using Diskpart:
- Open the “Start” menu, type “Diskpart” and press “Enter” to open the command prompt;
- When the prompt appears, type “list disk” and press “Enter” to see the disks connected to your system;
- If your external disk appears, pay close attention to its size – and make a note of its name. We’ll use “Disk 2” in this example, but you should use the name of your disk.
- Then type “select disc 2” and press “Enter” to clean your external disk;
- Finally, type “clean” and press “Enter”. This will erase all the data on the disk – requiring you to resort to data recovery programs or services.
Conclusion
The external disk not appearing in Disk Manager is a common problem for those who use this type of device.
To reverse this failure, you can use several alternatives: check the disk manager, test another USB port, check for problems via Device Manager, format/create a new partition or wipe the drive and format using Diskpart.
But it’s important to remember that by carrying out these actions, you could lose all the files saved on your external disk, so if you have any doubts, do nothing and look for a professional data recovery company.
If you’ve lost your data using any of the options we’ve listed – and the data on the device is important, you can count on us to recover it for you!
We at Bot have specialized in file recovery, using specific and assertive methods – as well as guaranteeing the integrity of the devices – for over 10 years.
What’s more, we offer free shipping of your device to us, from any address in Portugal, and we’ll send you a quote for your device within 48 hours – or less.
To start your recovery with us and become one of our more than 100,000 solved cases, fill in this form!