Removable disks are very useful when you want to store large files and don’t want to overload your computer’s memory.
Flash memory cards, external hard disks, SD cards and DVDs are some of the main examples of these devices.
They are detected by the computer automatically, but some problems can affect these devices making them unreadable or unrecordable.
If your disk has become “write protected”, find out in this article exactly what this problem is, what to do in this situation and some ways to fix it.
What is write protection?
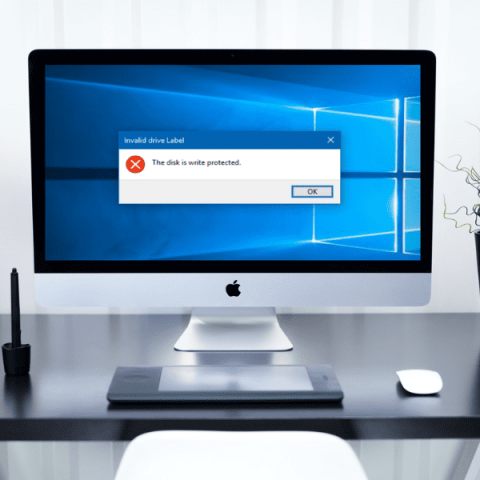
When you get an error message like “The Disk is Write Protected” as soon as you connect your peripheral storage device, it means that you can’t write to or Format the Disk until the problem is fixed.
This usually happens in Windows version 7, 8, 8.1 and the latest Windows 10.
A common cause that some users forget about is a key that the device may have that activates write protection.
If the storage device is full, you may also encounter this problem.
These problems are very easy to solve, but some cases are a little more complicated.
For example, this error may have been caused by a defective partition on the drive or the security may have been breached by a malware attack.
Once you can’t access your removable disk, you need to remove the write protection before you can use it again.
What to do when the disk is write protected?
When your computer detects write protection on the external storage device, it automatically stops the operation – from writing to formatting the device.
In this case, the disk will be switched to read-only mode, which means you can view the files, but you can’t edit them.
In some cases (such as USB Drive corruption), this disk malfunction can be resolved with the following methods:
1. Check if there are keys
Sometimes it is enough to toggle a small switch to remove the write protection.
In this case, just perform a physical check on your device to find any switch which is usually found on the edges of the SD card.
You can also consult the user manual.
2.Use the registry to disable write protection
To use this solution, follow the steps below:
- In the search bar, type “regedit” and click on the top result;
- In the “Registry Editor” interface, navigate through the steps located on the left-hand side of the window: “HKEY_LOCAL_MACHINESYSTEMCurrentControlSetControl”;
- Locate “StorageDevicePolicies” and open it by clicking “…”;
- Right-click on the empty space found on the right-hand side of the window and select “NEW”, then go to “DWORD VALUE (32-BIT)” and rename it to “WriteProtect”;
- Set the registry value to “0” and click “OK”;
- Finally, plug the external drive back in.
3.Remove write protection via Command Prompt
This solution requires you to carry out the steps below:
- Start the “Command Prompt”;
- In the command line type “diskpart” and press “Enter”;
- Type the commands below one by one and press the “Enter” key after each one:
list disk
select disk
attributes disk clear readonly
- When the Prompt displays the message “Disk Attributes Cleared Successfully”, close the Command Prompt window;
- Now reconnect your device.
4. Check account permissions
To check the account permissions and revert the write-protected disk, you must:
- Type “Command Prompt” in the search bar and click on the first result;
- Go to “Removable disk properties” by right-clicking;
- In the window that opens, go to the “Security” tab. Then select “Permissions for All” from the list and check the box next to “Save”.
Remember that you may need to click on “Edit” before checking/unchecking the options.
5. Check the device’s memory
If your external storage device is storing too many files, this can activate the write protection function.
To resolve this, you may need to delete unnecessary files to free up more space:
- Open “File Explorer”;
- On the left-hand side of the window, select “This Computer” and double-click it;
- Find the storage device by name or type. The storage details are found below the name. If the bar is red, it indicates that the memory is almost or completely full.
6. Check that you are not infected with viruses
If malware has infected your system, it may have been transferred to the external storage device as soon as you plugged it in.
Before using these devices, make sure you run a scan with an antivirus or Windows’ own security feature.
The virus can delete, modify and corrupt important files on your computer. To avoid this, install good antivirus software – it will automatically detect these threats.
7. Format the disk
You can also solve the write-protected disk problem by formatting the drive. To do this:
- Restart your PC and, as soon as it starts up, press “F8”. Then choose the “Boot in Safe Mode” option;
- Under “Advanced Options”, select “Command Prompt” to open the Prompt window;
- Type the “Format” command to format the selected disk drive.
Remember that formatting the device will erase all saved data.
8. Check the bad sectors
Your disk may have become write-protected as a result of a bad block. To check if this is the case:
- Open “File Explorer” and go to “This Computer”;
- Locate the external device, right-click on it and choose “Properties”;
- In the new window, go to “Tools” and select “Scan for bad sectors”.
Ways to repair the write-protected disk in Windows 11/10/8/7
When your flash drive, SD card, hard disk (internal or external) is write-protected, you cannot access the saved data or make changes to your device.
So, how do I remove write protection?
The write-protection problem is 99.9% because the device has a physical problem, but you can still try the following measures:
Changing the physical switch
Removable storage devices are widely used for storing data and can suffer from disk malfunctions, especially the “disk is write-protected” error.
When Windows starts write-protecting your disk, for example a flash drive, you can’t use it until you remove the write protection.
But you can solve this problem easily if the device has a physical switch.
Some USB flash drives and SD cards have physical switches on the side to protect the data.
If they are activated, the device is write-protected on all PCs or devices.
You can solve this problem by turning off the switch. To do this:
- Find the physical switch on your USB or SD card;
- Turn the physical switch from ON to OFF and unlock the device.
Scan and remove viruses
When you connect your storage device to your computer, it can easily be infected and attacked by viruses.
USB flash drives and SD cards can also be blocked or attacked after downloading from an illegal website.
The data would be blocked or inaccessible, which can lead to the error “the disk is write-protected”.
In this case, you need to find reliable antivirus software to scan and eliminate viruses.
Deselect read-only status
Sometimes a single file can upset the balance.
When you want to make changes to a single file but can’t, the file may be write-protected.
If this is your situation, you should check that the read-only option is activated.
For that:
- Right-click on the file with write protection and select “Properties”;
- Check the options at the bottom, making sure that “Read only” is unchecked. Then click on “Apply” for the change to take effect.
Run Command Prompt
Another effective way to remove write protection and resolve the “disk is write protected” error is to use the Command Prompt.
If you are familiar with CMD, follow the steps below:
- Press “Windows + R” simultaneously, type “cmd” and run the “Command Prompt” as administrator;
- Type the commands below one by one and press the “Enter” key after each one:
diskpart
list disk
select disk #
attributes disk clear readonly
(where # is the number of the drive with which you are receiving a write-protect error and is connected)
- Finally, exit the Command Prompt.
Editing the Register
There are many ways to remove write protection in Windows. One popular method is to edit the Registry.
Before you start, connect your write-protected flash drive to the computer.
- Press “Windows + R” keys simultaneously, type “regedit” in the “Run” dialog box and press “Enter” to open the “Registry Editor”;
- Navigate to the following location to look for a key called WriteProtect:
“HKEY_LOCAL_MACHINESYSTEMCurrentControlSetControlStorageDevicePolicies”
- If this key exists, right-click to select “Modify” to change the value from 1 to 0.
Conclusion
The hard disk can become write-protected due to activated physical security keys, full storage, a defective partition or a malware attack.
You can analyze which is the case by checking your device’s security keys, use the registry to disable write protection or remove the protection via the Command Prompt.
You can also check account permissions, check the device’s memory and/or scan for viruses.
Once you know what you did to cause your disk to become write-protected, you can fix the problem by changing the physical switch or check for and remove the virus.
You can also uncheck the read-only status, run the Command Prompt or edit the Registry.
Finally, other alternatives are to check for bad sectors or format the disk.
In this case, remember that the process will delete all the files stored on your drive – and to recover them, the best alternative is to turn to a professional data recovery service.
A service like the one we offer here at Bot!
We have over a decade of experience in data recovery, with more than 100,000 cases successfully resolved.
Our experts can recover your data, working with consolidated techniques, in a fully particle-controlled environment, guaranteeing the integrity of your device.
Furthermore, you don’t have to worry about the delivery of your device: we collect it free of charge from any address. You can also bring it to one of our receptions.
If you have any questions, you can also contact us on our social networks at any time of the day or night.
Trust those with tradition and proven results: start your recovery with us now!