The SATAFIRM S11 error is one of the most critical scenarios involving SATA SSDs, especially in devices based on controllers from the Phison PS3111-S11 family. When this failure occurs, the SSD is unable to initialize its firmware properly and starts being identified generically by the system, losing recognition of the original model and logical access to the data.
In laboratory practice, this type of error is frequently observed in analyses involving Kingston A400 series SSDs, although it is not restricted to that model or to any specific brand. The determining factor lies in the controller and the firmware state, not in the device’s commercial name.
Although this behavior may seem unusual at first glance, SATAFIRM S11 follows a well-defined technical pattern. Understanding what happens inside the SSD—especially during the firmware initialization process—is essential for making safe decisions and avoiding attempts that may worsen the problem or permanently compromise the stored data.
Quick summary: what does it mean when an SSD shows up as SATAFIRM S11?
When an SSD starts being recognized as SATAFIRM S11, it indicates that the device failed to complete firmware initialization. In this condition, the SSD does not load its internal routines or the logical layer responsible for organizing data, and it identifies itself only through a minimal controller state.
In practice, this is not a slow or “corrupted” SSD, but a device that failed before it even became operational. For this reason, the system does not find valid volumes and does not allow access to the stored content.
What is the SATAFIRM S11 error, technically speaking?
Why the SSD stops being recognized by its original model
A healthy SSD initializes firmware, loads its internal tables, and presents itself to the system with the name, model, and capacity defined by the manufacturer, such as Kingston A400 or specific commercial identifiers, for example SA400S37/240G, SA400S37/480G, and SA400S37/960G.
When a critical failure in firmware initialization occurs, this process is interrupted in the early stages. As a result, the SSD fails to correctly recognize the original model and capacity, operating only in a minimal controller state.
In this condition, the device is identified by the system with a generic label associated with the controller, such as SATAFIRM S11 or, in some cases, simply PS3111. This behavior is widely documented in technical analyses by professional data recovery companies and in specialized materials about SSD firmware failures, including technical content published on the ACE Lab PC-3000 Support Blog.
SATAFIRM S11 is not the SSD’s name, but a failure state
It is important to clarify that SATAFIRM S11 is not an SSD model. It is a firmware failure state in which the device cannot load its internal structures and exposes only a basic controller identifier.
In similar situations—especially in SSDs based on the same controller family—the device may identify itself only as PS3111 or another generic designation. Despite the variation in the displayed string, the nature of the problem remains the same: a critical firmware initialization failure.
Which SSD controllers are most associated with the SATAFIRM S11 error?
Phison controllers from the PS3111 family (S11 and derivatives)
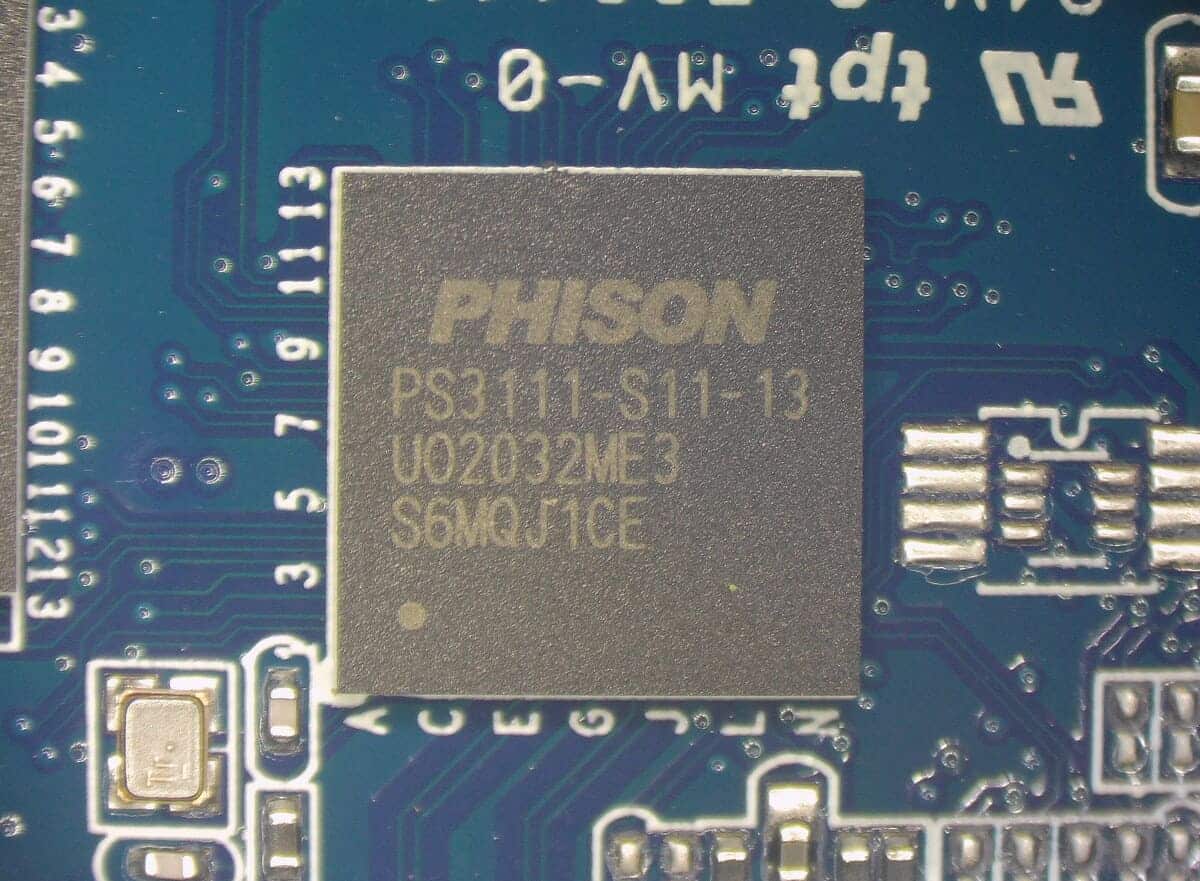
The SATAFIRM S11 error is strongly associated with controllers from the Phison PS3111 family, widely used in entry-level SATA SSDs. Several manufacturers adopt this architectural base, applying firmware micro-customizations and their own naming conventions.
In practice, this is clear in analyses involving Kingston A400 series SSDs. Although these devices may carry controller package markings such as CP33238B, this is, in reality, a rebrand based on the Phison PS3111-S11 architecture, with micro-customizations applied by the manufacturer. When a critical firmware failure occurs in these models, the SSD stops presenting its original name and capacity and begins to be identified by the system with generic labels such as SATAFIRM S11 or PS3111, reflecting the minimal state exposed by the controller after the initialization failure.

In some cases, the controller may appear under another internal name—such as brand-customized controllers—while still retaining the PS3111 technical matrix. This shared base explains the recurrence of the SATAFIRM S11 error across different brands and SSD batches.
Why it’s not possible to list all affected SSD models
It is not feasible to tie SATAFIRM S11 to a closed list of SSD models. The same commercial model can use different controllers depending on the production batch, NAND memory supplier, internal revisions, or even the manufacturing region.
In laboratory practice, it is common to find the same type of failure in devices from different brands and product lines. There are records, for example, of SSDs such as PNY CS900 (240 GB), Patriot Burst (120 GB), Multilaser Warrior W500 (240 GB), and Gigabyte (256 GB) showing the SATAFIRM S11 state, all based on architectures derived from Phison PS3111.
There are also cases in which the controller carries another commercial identifier, such as in Multilaser Axis 400 line models, which use controllers labeled as AS2258 but internally maintain a technical base compatible with PS3111, resulting from rebranding or firmware adaptations made by the manufacturer.
These examples illustrate why a correct analysis must always consider the controller actually present and the firmware state, not just the brand, the commercial model, or the advertised SSD capacity.
What causes the SATAFIRM S11 error?
Firmware corruption and failure in logical initialization
The most common cause of SATAFIRM S11 is firmware corruption, which prevents the loading of the Flash Translation Layer (FTL). The FTL is the layer responsible for mapping the system’s logical addresses to the physical addresses in NAND memory.
When the FTL is not loaded, the SSD loses the map that indicates where the data is stored. Even if the information still physically exists in NAND memory, logical access becomes impossible.
Power issues, critical interruptions, and flash memory degradation
Power outages, electrical instability, or interruptions during sensitive operations, such as internal write processes and firmware updates, can trigger SATAFIRM S11. In these situations, the firmware enters an inconsistent state and the SSD cannot complete initialization.
In addition, the natural degradation of flash memory (NAND)—inherent to non-volatile memory-based devices—can compromise critical areas where SSD firmware and internal structures are stored. Over time and with use, memory cells undergo progressive wear.
When this degradation affects sensitive regions related to the loading of the firmware and the Flash Translation Layer (FTL), the SSD may fail during initialization and identify itself only in a basic controller state, resulting in recognition as SATAFIRM S11.
This scenario explains why this type of failure can occur even without an obvious electrical event. It’s not only about abrupt failures, but also about aging and the physical limitations of flash memory. If the SSD contains important data and there is no backup available, the safest approach is to stop using the device and seek specialized technical guidance. In situations like this, talking to a Bot specialist for a free diagnosis helps define the safest path.
How to identify an SSD with SATAFIRM S11 in practice
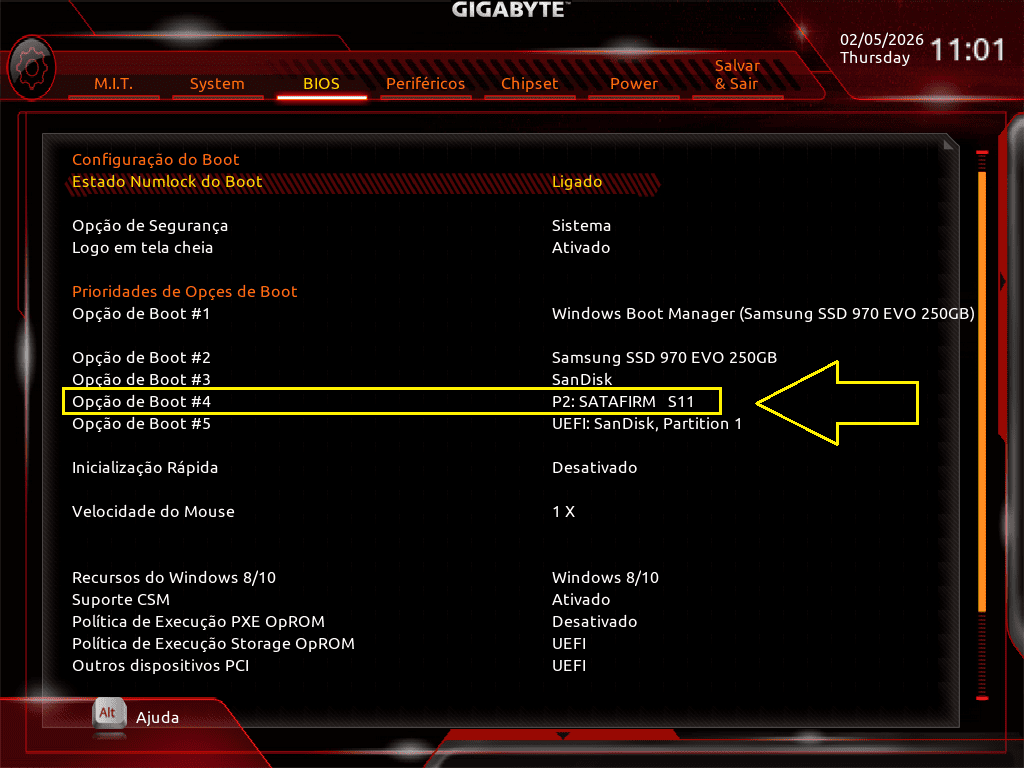
Identification in BIOS or UEFI
In BIOS or UEFI, the SSD stops appearing with its commercial name and is listed as SATAFIRM S11 or another generic identifier related to the controller. If you got here because your SSD stopped being recognized (or shows a strange identification), it’s also worth checking Bot’s broader guide on this symptom: SSD not recognized: solutions and how to avoid this error.
Identification in Windows
In Windows, when connecting the SSD, the device may be identified as SATAFIRM S11 both in Device Manager and in Disk Management. In both cases, the system detects the physical presence of the hardware but cannot establish functional communication with the firmware, preventing it from reading the real capacity, mounting volumes, or accessing data.


Identification in macOS
In macOS, an SSD affected by SATAFIRM S11 may appear in Disk Utility with a generic identification, no manufacturer name, incorrect capacity, or even without allowing the volume to mount.
In many cases, the system recognizes only the physical presence of the device but cannot access any valid logical structure. This occurs because firmware initialization did not complete and macOS does not receive enough information to identify the model, capacity, or file system.
In practice, the SSD does not mount on the macOS Desktop, does not appear as a usable volume in Finder, and remains inaccessible even though it is listed in the system. This behavior indicates that the device did not reach a functional operational state, reflecting the critical initialization failure associated with SATAFIRM S11.
Identification in Linux
On Linux systems, graphical tools such as the Disks utility may show the device with a generic identification or without a valid capacity. In some cases, not even a functional block device is created.
In more technical environments, when using the smartctl command, it is common to observe that the SSD is identified only as SATAFIRM S11 or with a generic string associated with the controller, without valid model, capacity, or SMART attribute information. This behavior confirms that the device did not complete firmware initialization and that the internal routines required to expose data and health metrics are not accessible to the system.
What this type of error means for stored data
Why, in most cases, there isn’t even a volume to format — and what that means for the data
Because firmware did not initialize, there is no valid logical structure. In practice, there is no mounted volume, functional file system, or internal tables that can be formatted or repaired by conventional tools.
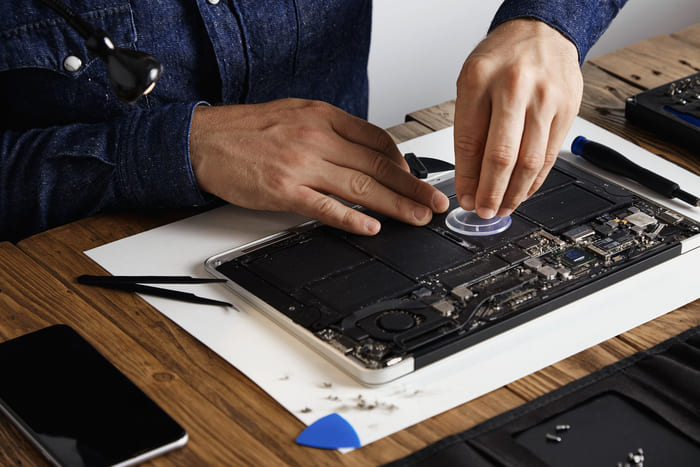
When access to the data is needed in this scenario, handling must be done in a specialized laboratory environment. Access attempts do not occur at the operating system level, but involve controlled procedures directly on the SSD controller, executed with professional equipment.
Technically, the process typically begins by activating the controller’s safe mode, often through physical procedures provided for by the manufacturer. From that state, it is possible to load a loader compatible with the controller family, enabling communication with the device’s internal routines.
After loading the loader, internal structure adaptation steps are performed, including the creation or reconstruction of the translator. Only then is it possible to enable reading processes in a specialized environment, such as the Data Extractor, a module integrated into the PC-3000 hardware, responsible for providing controlled access for reading and cloning the data area.
Rare intermittent scenarios and additional risks to the data
In exceptional situations, the SSD may exhibit intermittent behavior, alternating between partial recognition states and complete failure. These scenarios require additional caution, as repeated attempts to use it can worsen existing firmware corruption.
This worsening may occur both due to the progressive degradation of NAND memory cells, with new internal reallocation attempts, and due to additional failures during unstable initialization cycles. In some cases, the SSD may even display messages suggesting formatting—not because there is a functional file system, but because it cannot validate minimal logical structures.
If formatting is started in this unstable state and, for any reason, the command is partially executed, there is a risk of triggering internal mechanisms such as TRIM, causing memory blocks to be logically marked as empty. This type of action can significantly worsen the situation, reducing the chances of later accessing the data.
Does reflashing the firmware fix SATAFIRM S11?
Recovering the SSD is not the same as recovering the data
Reflashing the firmware may cause the SSD to be recognized by the system again. However, this procedure typically involves completely erasing the NAND memory. In practice, it may restore the device’s functionality, but it does not preserve the stored data.
When reflashing makes sense
Firmware updating or reflashing should only be considered when the data has no value or when the goal is simply to reuse the SSD, aware of the total loss of stored information.
Is it possible to prevent the SATAFIRM S11 error?
Some best practices help reduce the risk of failures, such as keeping backups up to date, performing firmware updates only with official manufacturer tools, and ensuring electrical stability in the environment where the SSD is used. These measures minimize unnecessary exposure, but they do not eliminate the risk entirely.
It is important to consider that firmware failures may occur as a consequence of the limitations of NAND technology and the way data is written and managed internally, especially in entry-level SSDs. In laboratory practice, it is common to see devices from very generic brands—often with simplified electronic architectures and low-quality NAND memory—showing early degradation.
These scenarios have translated into SSDs that fail after a short period of use, sometimes before even completing one or two years of operation. This reinforces that even with best practices in place, hardware reliability and component quality remain determining factors for device longevity.
Conclusion
When an SSD starts being recognized as SATAFIRM S11, we are facing a critical firmware initialization failure, in which the device can no longer follow its normal operating protocols. In these cases, it is not a simple logical error, but a condition in which the SSD does not reach a valid operational state.
Given this scenario, it is essential to stop any attempt to use the device and avoid repeated attempts with generic tools or forced procedures. The priority must always be data preservation and a proper technical evaluation of the controller, firmware, and NAND memory state.
When there are signs of firmware corruption, controller failure, or electrical issues, intervention must be performed by professionals with the right infrastructure and specialized knowledge. This is the context in which Bot Recuperação de Dados can help.
With in-house laboratories and the exclusive WhiteRoom®, Bot performs diagnostics and recovery processes in a controlled environment, ensuring device integrity throughout every stage of the work.
We offer free shipping from anywhere in Brazil, free diagnosis within up to 48 hours, and specialized technical follow-up, with full transparency regarding the possibilities, risks, and limitations of each case.
👉 Start your recovery right now.
International trust, real results:
- More than 200,000 cases successfully resolved;
- 95% average customer satisfaction;
- Operations in Brazil, Portugal, and Spain with our own infrastructure;
- A reference in data recovery for HDDs, SSDs, RAIDs, and physically damaged devices;
- Technical, human support with no fine print.
We hope this content has helped you understand what the SATAFIRM S11 error means and the safest, most responsible ways to handle this type of SSD failure.
This content was produced by the technical team at Bot Recuperação de Dados, a multinational leader in advanced data recovery solutions.